I’m a reader. Not entirely surprising from someone writing things on the internet, but still a fact. I am also a very tactile person. I would rather work in physical media than digital. Even writing comes more easily with a pen and paper than typed out in some software. These facts combined mean I like collecting books. My collection is not nearly as large as it could be, but it is continually growing.
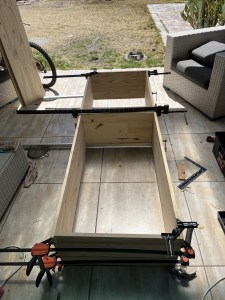
Thus, I periodically find myself short on bookshelf space. At which point, I have a need to begin building more of them. I’m getting quite good at building bookshelves actually. Having started with some fairly simple ones, held together with screws and shelf-blocks, I have since moved on to the far messier, but much stronger method of glue and dowels. It has taken some time, and experience, for me to trust glue more than screws, but having worked a few projects I have accepted that it forms a much better bond. The other benefit is that glued furniture creaks less as it shifts with temperature changes. When the wood moves, it does so in a more natural way when the joints are glued, and there is less creaking and cracking at random times.
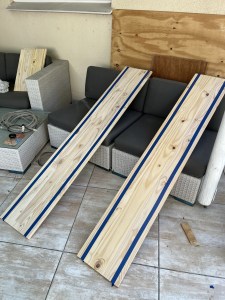
Bookshelves are pretty easy to make, if you have enough clamps and patience. In fact, if you’re just getting started with DIY they are a great beginner project, because you really don’t need much more than a drill, some hardware, glue, and clamps. You can even buy your wood cut to size from most suppliers, meaning you don’t need to own a saw, and you don’t have to try and cut a straight line. My bookshelves are all based on an IKEA design. Billy gets a lot of love, because it is one of the most versatile, and useful, IKEA bookshelves. Conceptually it is great, the top, bottom, and middle shelves are in a fixed position, and then there are holes at regular intervals for variable height shelving in between. Doing this at home is mostly a case of having the right drill bit, and measuring well enough.
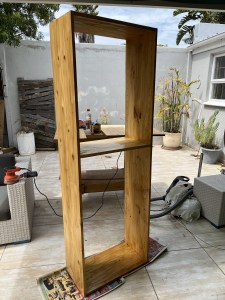
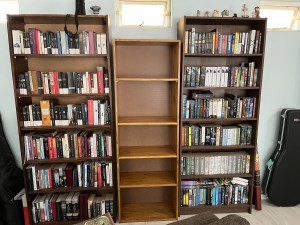
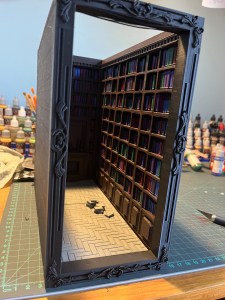
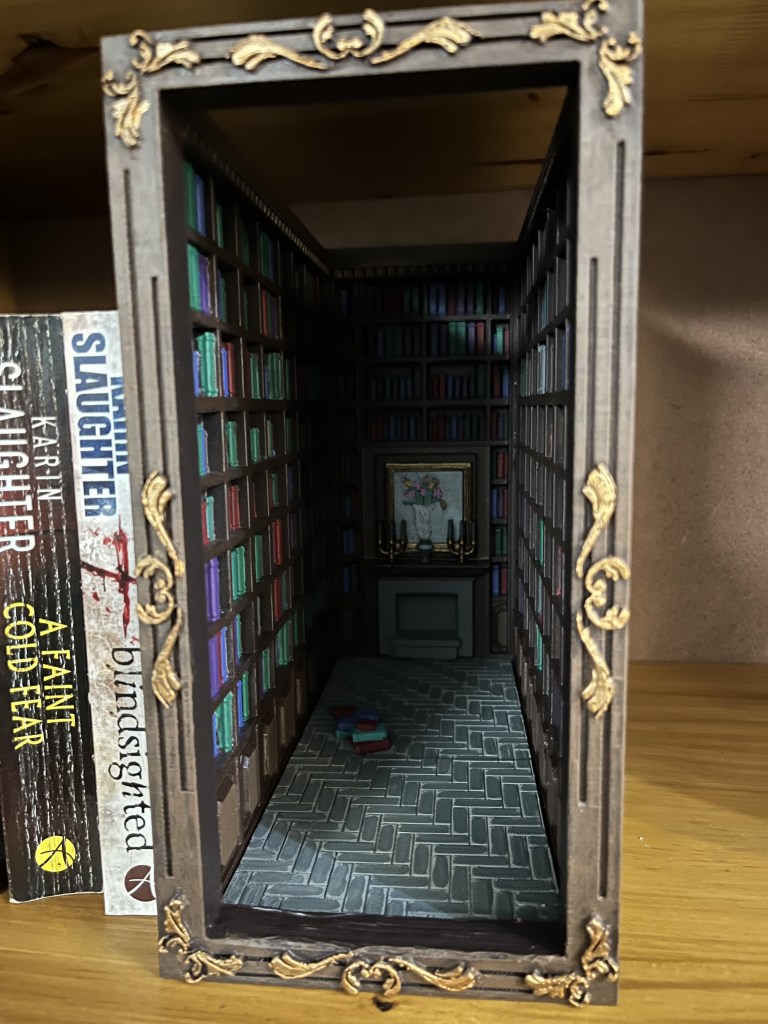
In this particular instance, rather than building just enough shelving to keep up with my overflow, I built extra space. Having enough shelf space to put more than just books on display. Puzzles, board games, ornaments. All of these things look great in a bookshelf, when there is space. It also opened up something which I think is great fun. Bookshelf inserts. Also known as book-nooks, these are ornamental pieces designed to fit between books in a shelf and simply add a fun aesthetic value. There are many very clever designers out there in the interwebs, and they make their designs available for reasonable prices. Which means I have 3D models in my library just waiting to be printed.
3D printing is one of those aspects to crafting and creativity which can suck you into a spiral of endless possibilities. You don’t even need particular skill with 3D modelling for the cost of your first printer to pay off. The trick is limiting yourself to just the one printer. So, yes, I can print out fun things to add to my bookshelves. Many people would care about the colour in which they print, or the style. I tend to be a bit lackadaisical about it, because I am a painter. I have various types of goop and modelling paste to fill in gaps and imperfections. I can cut off blobs with a knife. And I enjoy the process of bringing a monotone piece of plastic to life by applying colour with a brush.
The many steps of the process can be quite relaxing. Beginning by printing all the pieces, and cleaning out any supports, I then move on to gap filling where needed, and trimming to fit anything together. Depending on the model I will often paint before gluing, simply because there are some corners not conducive to clean brush strokes after gluing. The difference in this process to the one I use when doing woodwork is truly one of scale, detail, and materials only. Wood tends to be for pieces which are larger than I am, whilst printing is for pieces many times smaller. The detail on the smaller pieces is often far more intricate. I will focus on clean strokes, and ensuring that the colours are exactly what I want. Layering to add depth, choosing my primer carefully to cause the model to pop, or to have a darkness to it.
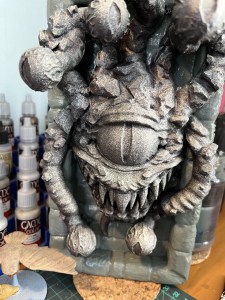
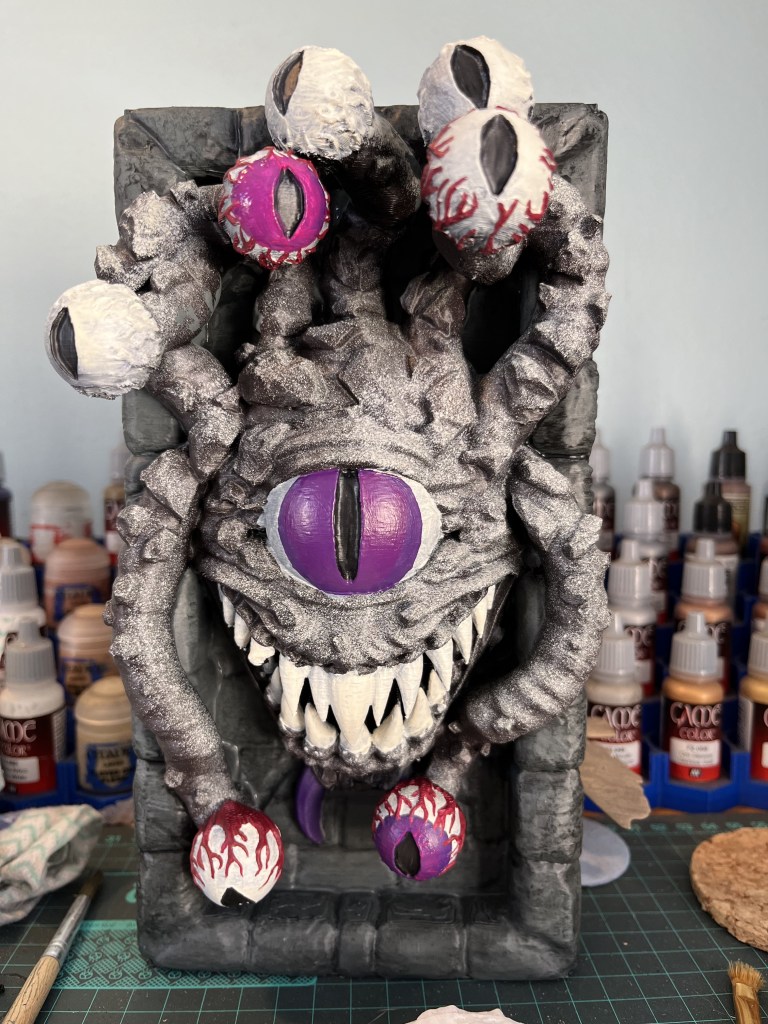
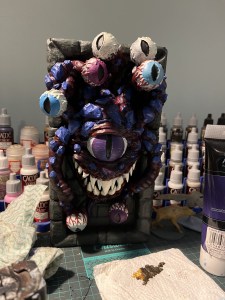

In the case of this Beholder (or eye-monster if you want to avoid legal issues) I began with a dark primer. Spray paint is great for priming these. Then, because I wanted to play with shadows, I took a light colour, and sprayed it over from a specific angle. Not getting the light paint in all the cracks and shadows means the colours will be slightly darker and more muted in those spaces. It is not hugely obvious, but it can also help when choosing colours to apply to know where the shadows would be. From there is was a matter of bringing the details of the model to life. Beginning with basic details, adding depth and texture with dry-brushing, and adding sharp edges to the crystal structure with outlines. In many ways this is a simple piece, but effective nonetheless, and it looks good peering out from between my books.
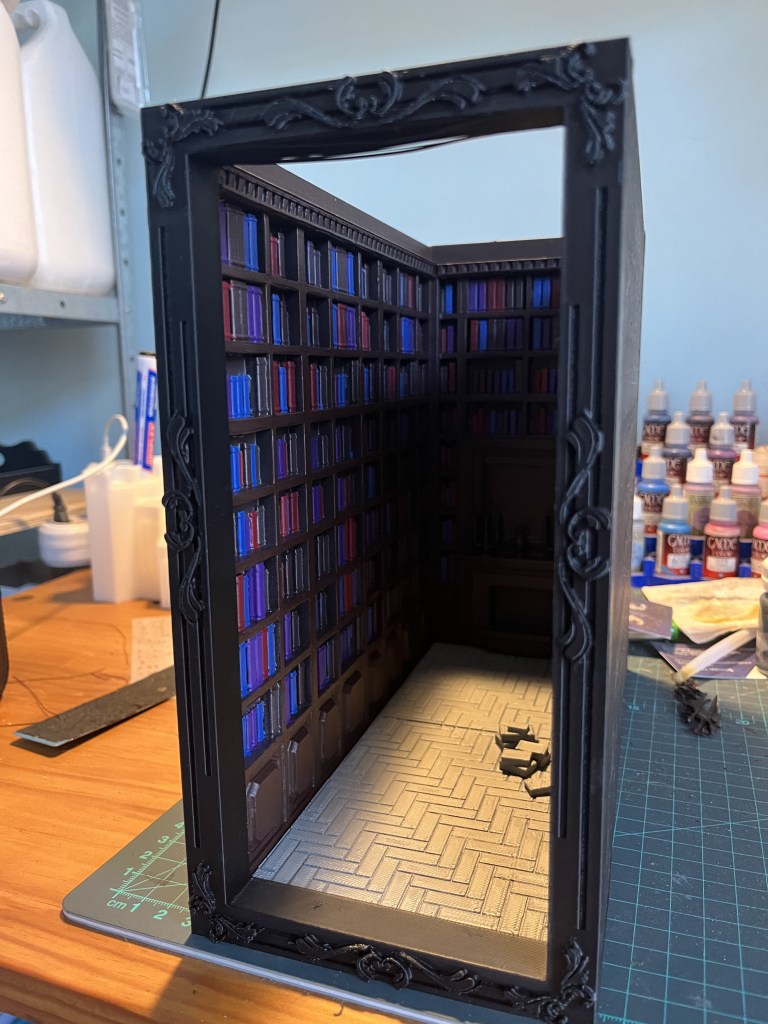
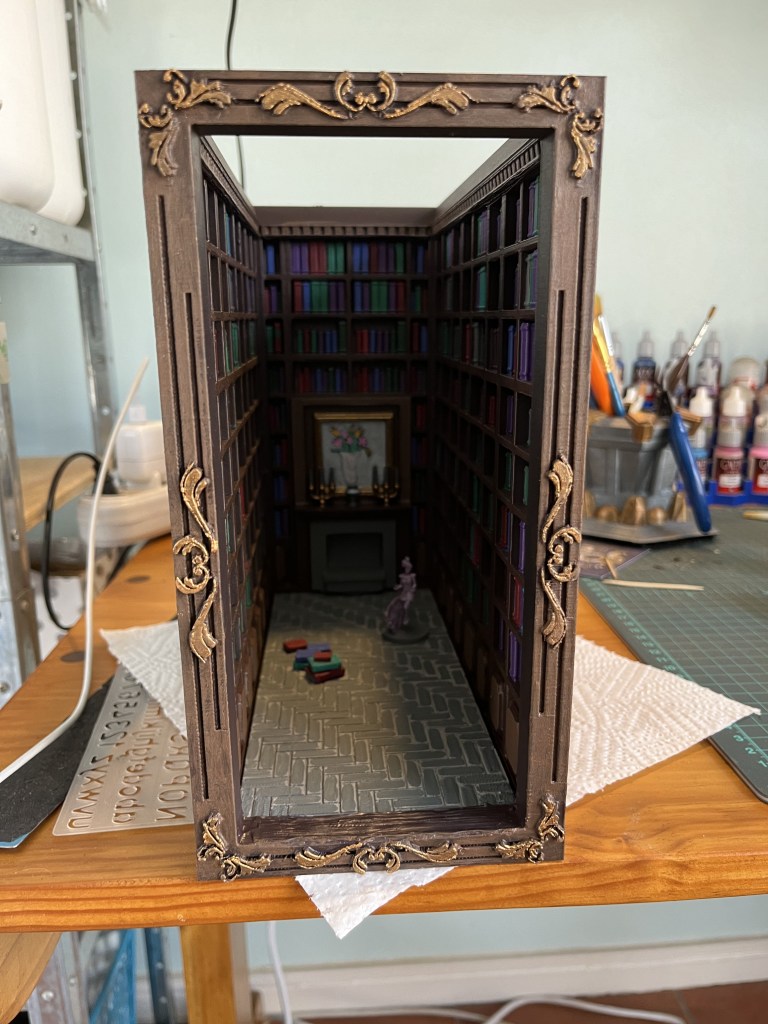
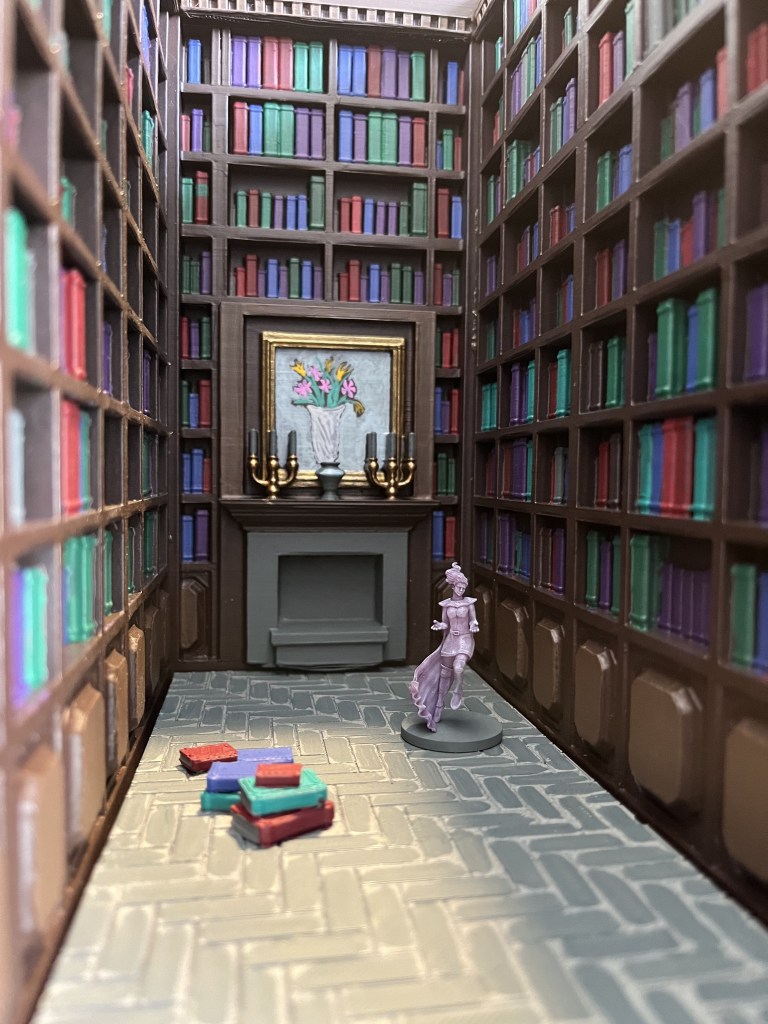
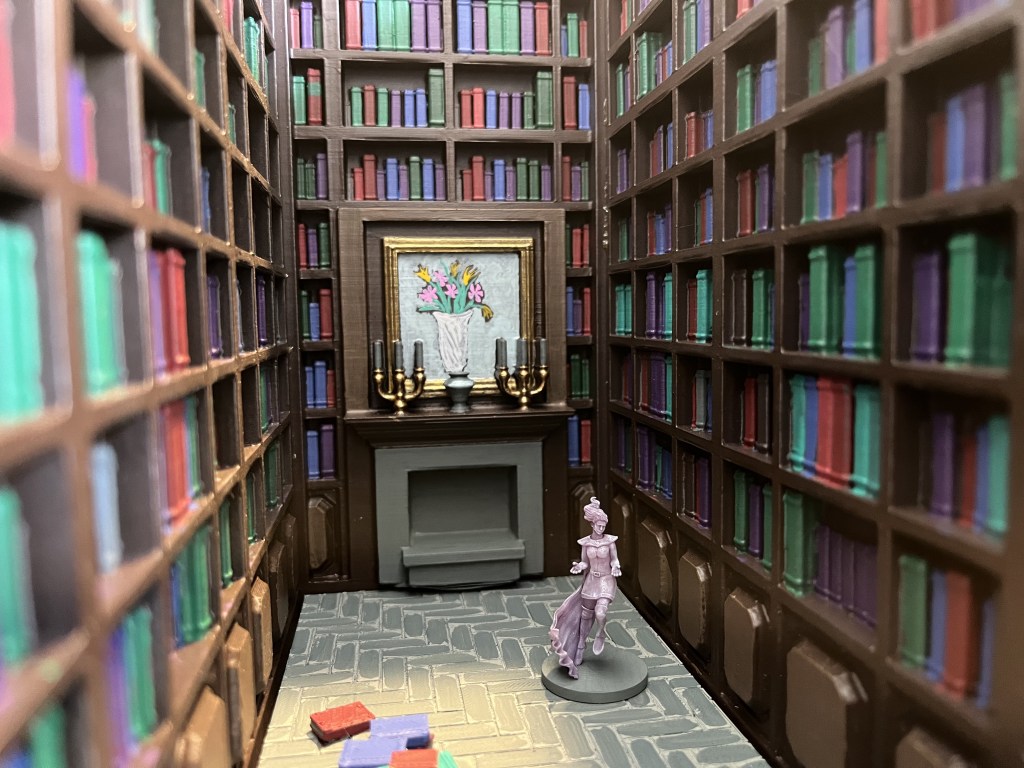
A more complex and detailed piece was the inset library. Every book on the shelves needed a colour on the spine. Every shelf needed to be covered. Every detail needed to be touched. The floor even needed to be layered to provide a sense of age to the flagstones. The most fun part was the back wall. The top half is simply more books, but below that there is an empty fireplace with candlesticks and a canvas on the mantle. In the 3D model that canvas is empty.
Freehand painting in acrylics is something I have dabbled in from time to time. Most of my experience with the medium is in miniatures though. So mixing the two was a fun challenge. The joy of tiny scale painting is that you can get away with a couple of vague concepts, but still give the impression of detail. If you then choose to do something simple, but elegant, you can bring life to an otherwise boring wall.
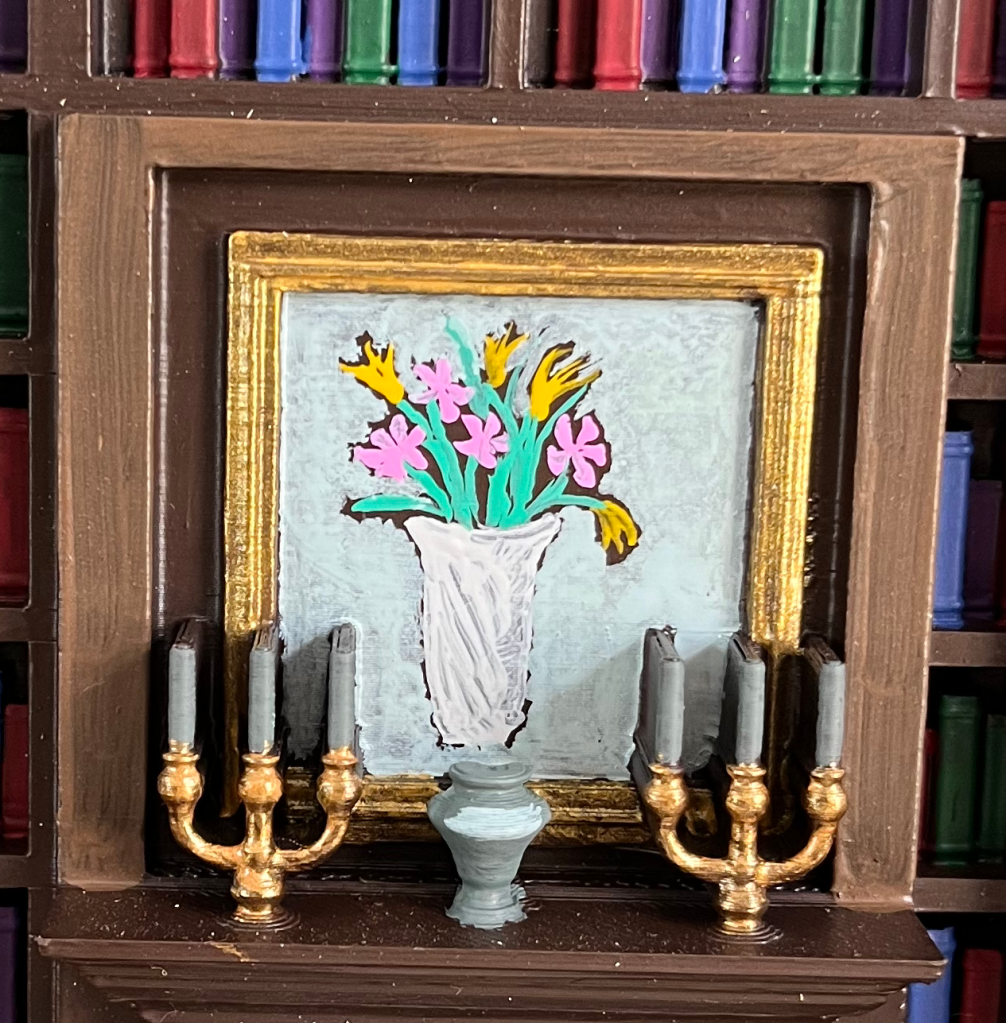
Taking a close look at the image, it is clear that it was done quickly and that the flowers are not real. It is a simple still-life style painting, but the lack of details might be disappointing. Then you remember that the canvas is only 4cm across. I have done more detailed work in the past, but for the back wall of a library embedded in a bookshelf, this is sufficient. Some shiny gold paint on the frame to add a bit of bling, and the final result is something which can sit in my living room without embarrassment.