Some projects take time. Projects in which one is learning new skills take extra time. Of course minor flooding in the work area doesn’t reduce the amount of time the project takes, but I’m not convinced that was the biggest factor at play. In February of 2024 I bought a bunch of wood for a project, I completed it near the end of September. My 3D printers needed to be better managed. The table they sat on was not sturdy enough to handle the 300mm/s speed of the Creality K1, and it had been relegated to the floor. My plan was to build a cabinet/workbench which would both serve as a surface for the printers, and storage for all the paraphernalia they collect (filament spools, toolboxes, resin, alcohol, gloves, etc).
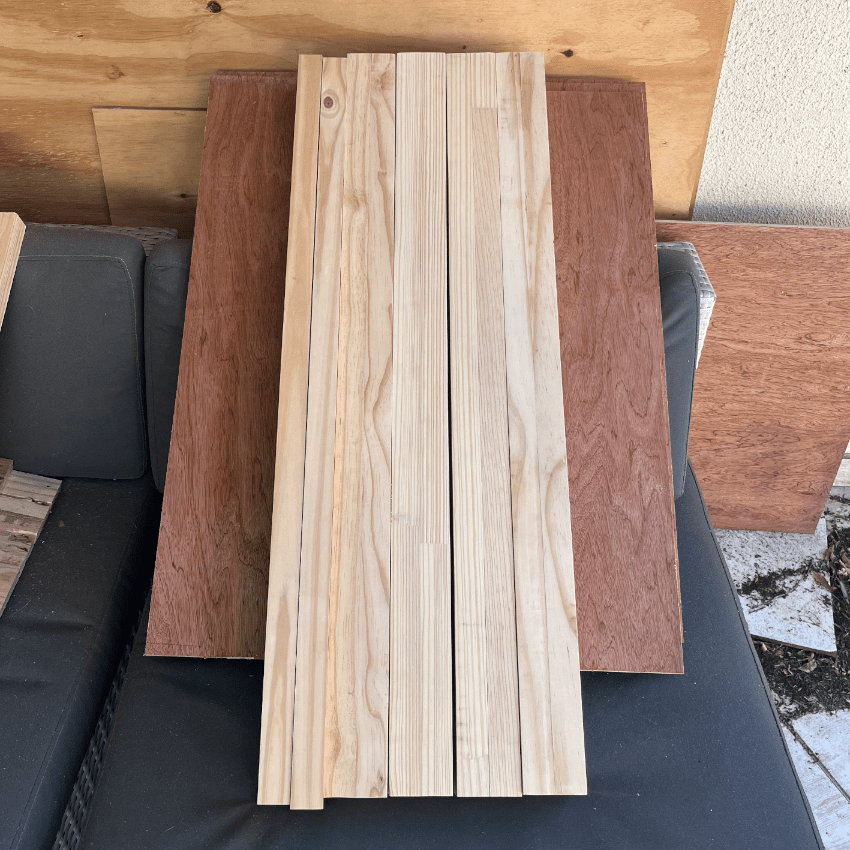
As is the nature of any good project this one matured over the time it took me to get started. The more I though about it, the more appealing built-in plug points seemed. I also regularly left a UV lamp running over some of my resin materials, and so I thought maybe a light fitting in the storage space would make that more convenient. I also knew it needed to be really solid and strong. Which meant good joinery, panelling to deal with shifting, and solid wood. I wanted both drawers and shelves, because of the nature of the stuff that needed storing, and I had a certain amount of space available.
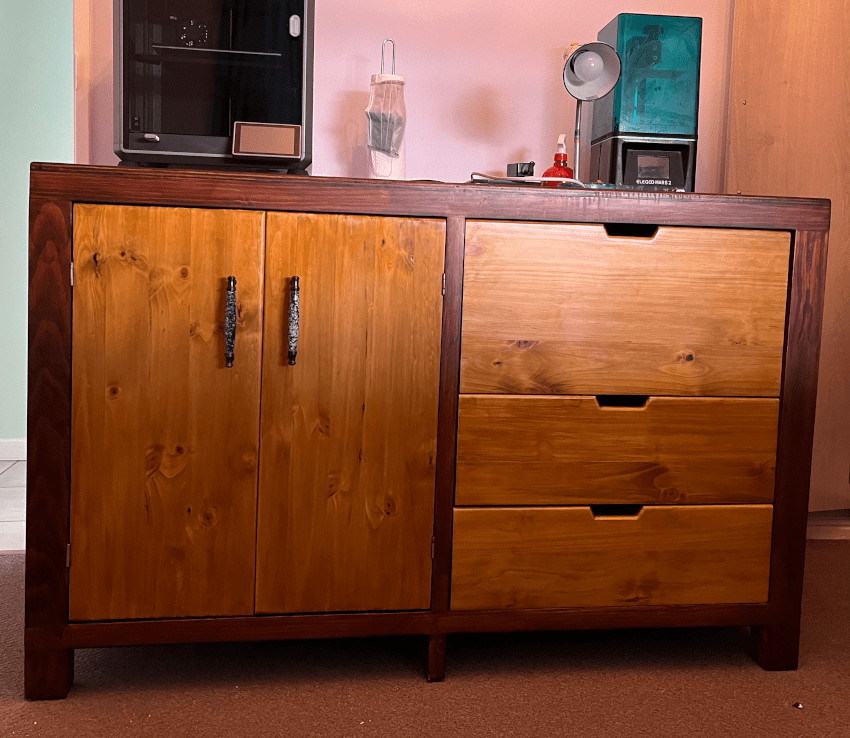
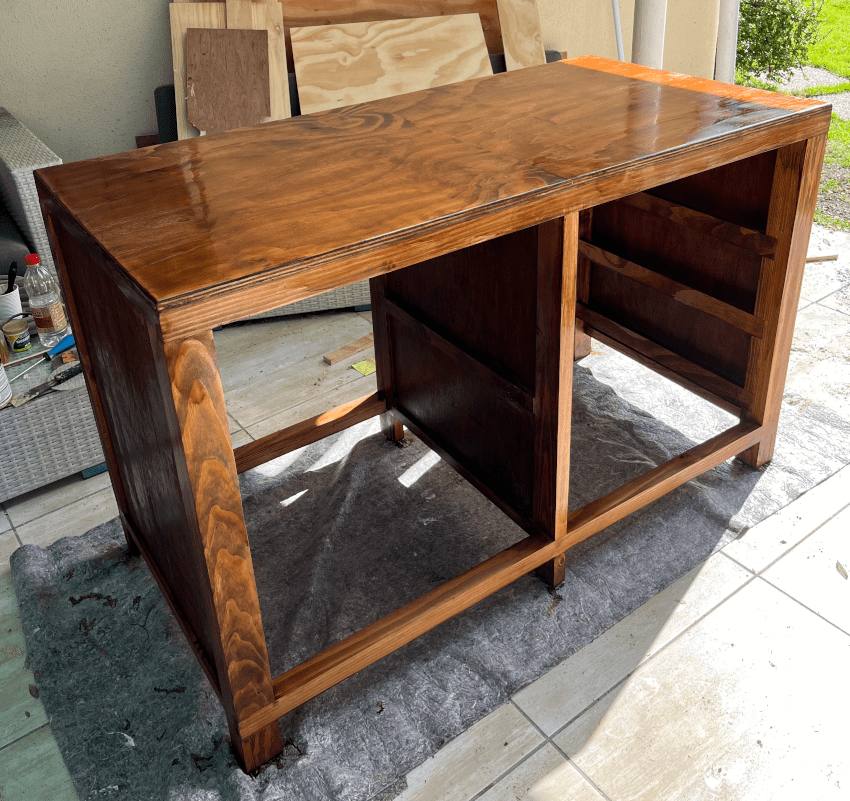
What I ended up with is arguably the heaviest piece of furniture I own (there is a sideboard which might be heavier), but it does not wobble when the printer is running. The drawers slide smoothly. The doors of the cupboard close securely. And it looks better than a rickety table. It is also a convenient height at which to stand and work with the printers. Either cleaning off resin prints, or doing maintenance on the K1. It has a built in plug point, which means no fishing around behind or underneath to access a multi-plug, and I can press a button and flood the top drawer with UV light for as long as I need.
I have mentioned that it took time. It is not an overly complex project, if you know what you are doing, and have all the right tools to hand for the job. Since neither of these things were true, and I work on my patio which means extreme weather is a blocker, it took me almost four months from first cut to complete. Not counting time in which I had the wood, but hadn’t started the project. Of course, I also changed the design in the time between getting all the wood, and starting work. If you’re familiar with the way software projects develop, you will recognise the scope creep that I failed to avoid. In the end the product is actually what I wanted, and I learnt a lot. So scope creep and all, I consider it a success.
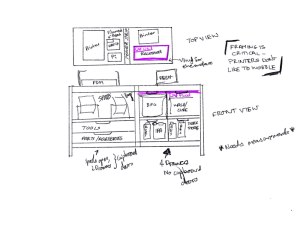
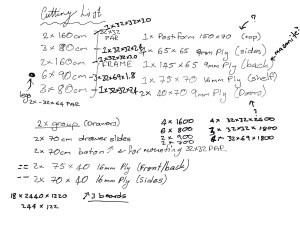
The design process I follow for a piece of furniture is hardly a precise art. I look at things I like, and try to figure out how they were done. I also rely on the various knowledge that has soaked into my subconscious from far too much YouTube, and previous experience with tools and materials. I then spend time drawing, and thinking about, the idea and the concept. Sometimes those drawings are good, sometimes they’re scrappy. Many times the version in my head is far more accurate than anything I have on paper. From the rough drawings (and you can see in this example just how rough that might be) I will build a cutting list. This gives me most of the wood I know I’m going to need. In this particular project, where strength was a priority, the fact that I have a terrible sense of scale worked against me. Some of the wood I originally ordered was not what I actually wanted. I ended up getting a couple more pieces later. Additionally, my cutting list only shows two drawers. I ended up with three by changing the sizes just so, and cutting pieces in two.
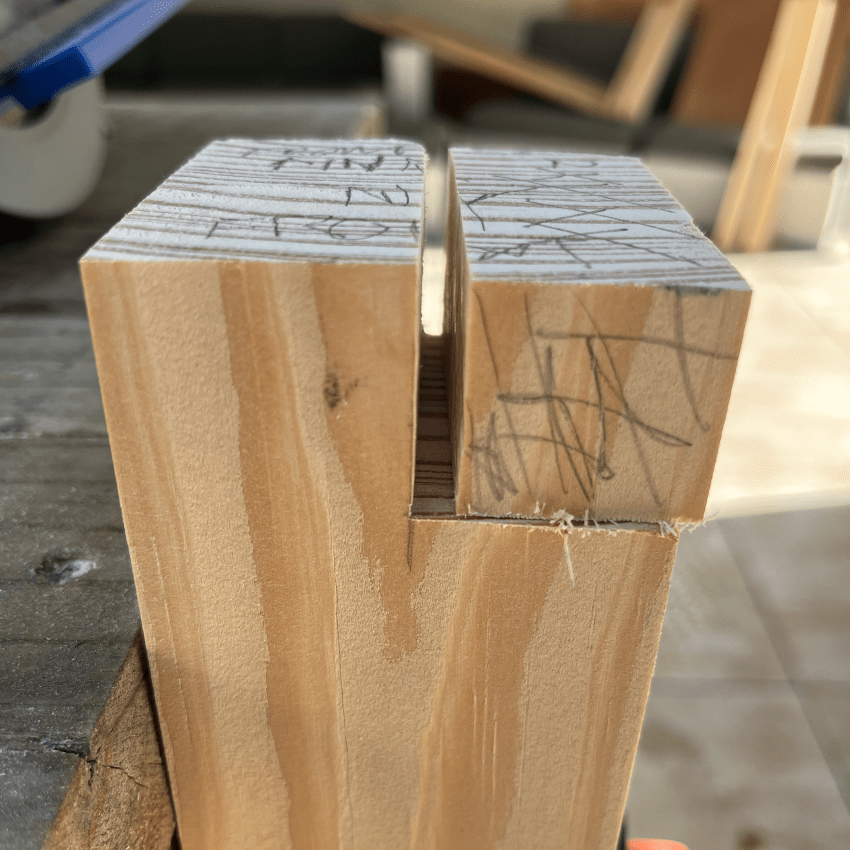
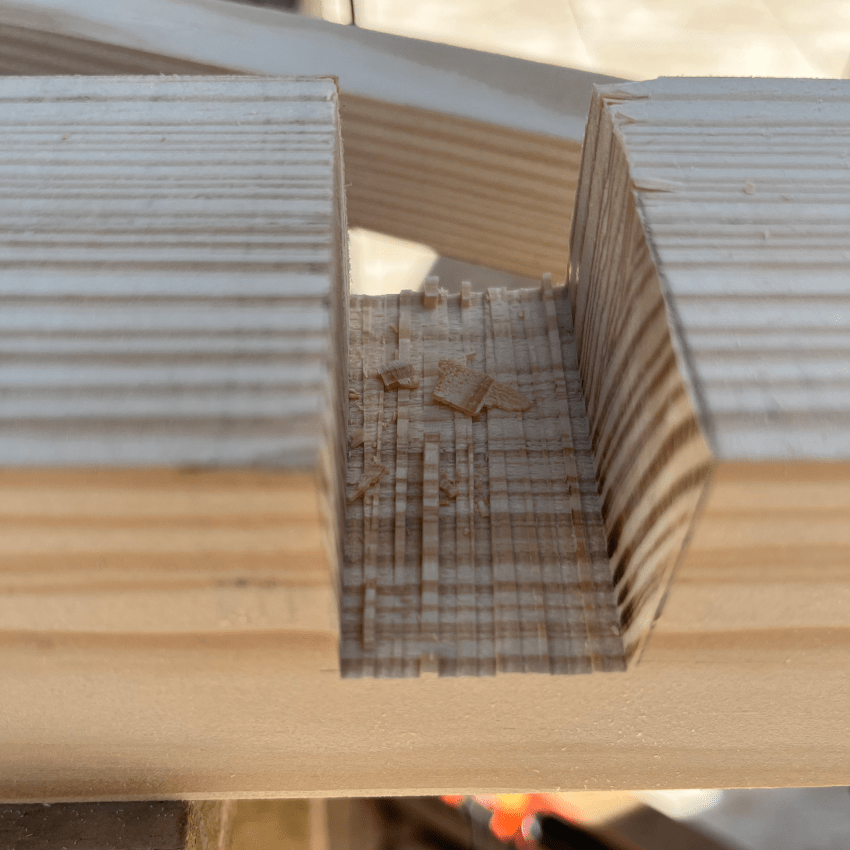
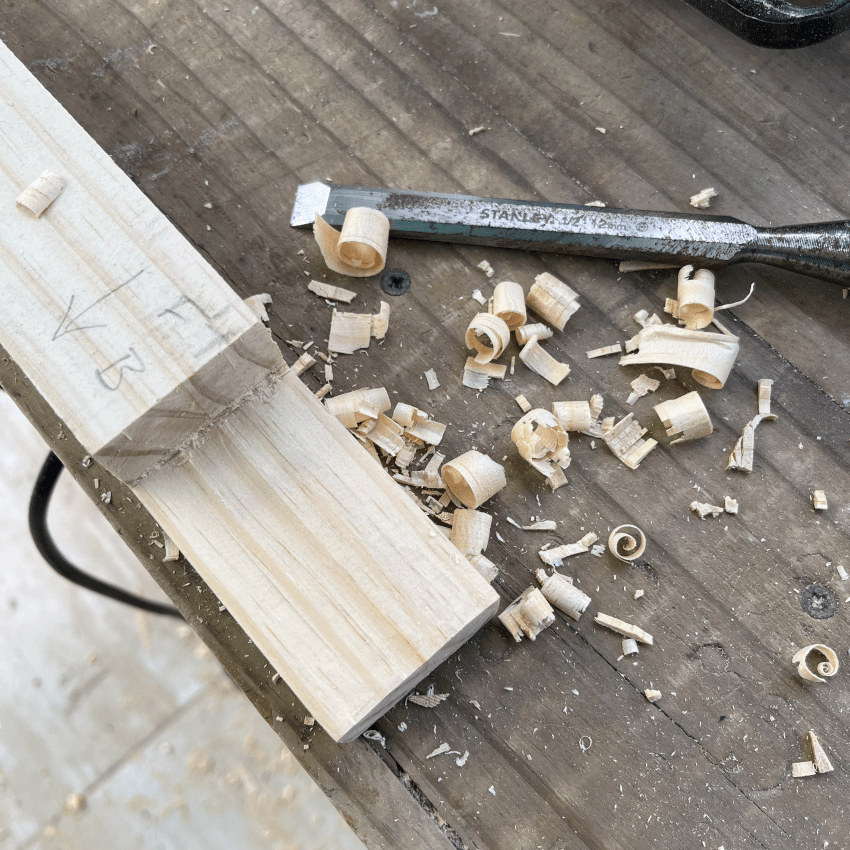
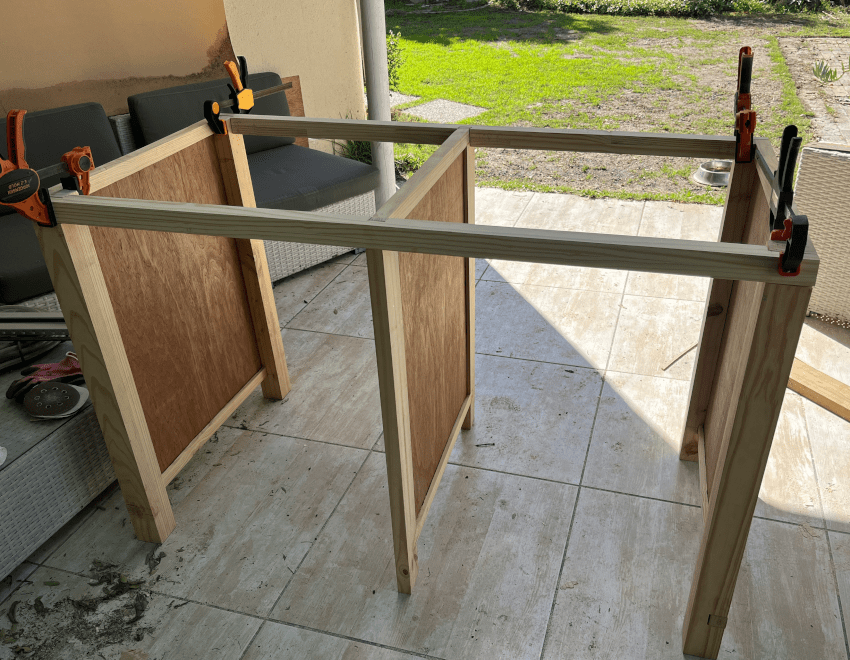
Wood in hand, I can begin the assembly process. This included a number of techniques I had never tried before. The extent of my joinery knowledge was loose tenon joints using dowels. Which is not to say those are poor joints, but they are fairly simple. To make the side and central panels for this cabinet, I wanted to embed thin (9mm) plywood into a solid wood frame. I planned half lap joints for the corners, and dados in which to slide the plywood. For this to work, I had to both cut the laps accurately, and route reasonably straight lines in the framing pieces. Thus began my love-hate relationship with a plunge router. Why no router table? Quite simply because I didn’t have one, and wasn’t really confident with a router at all, so making one didn’t even cross my mind. I used a guide, lots of clamping, and I took my time. There are definitely places in the final cabinet where you can see that I lost control of the router. Thankfully, they are internal and mostly hidden behind drawers or shelves.
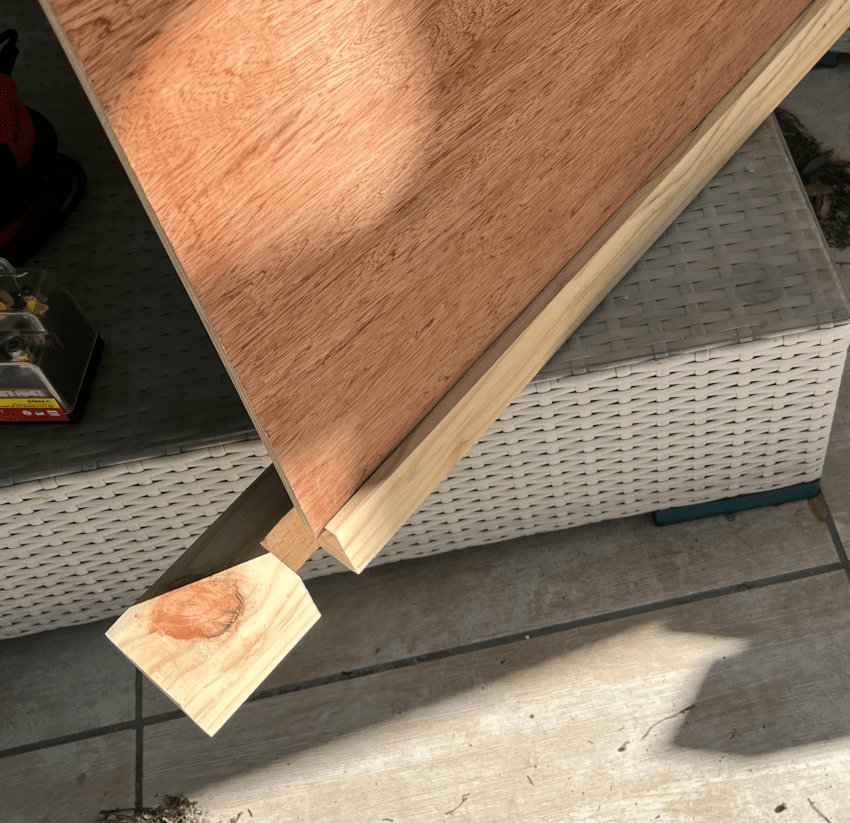
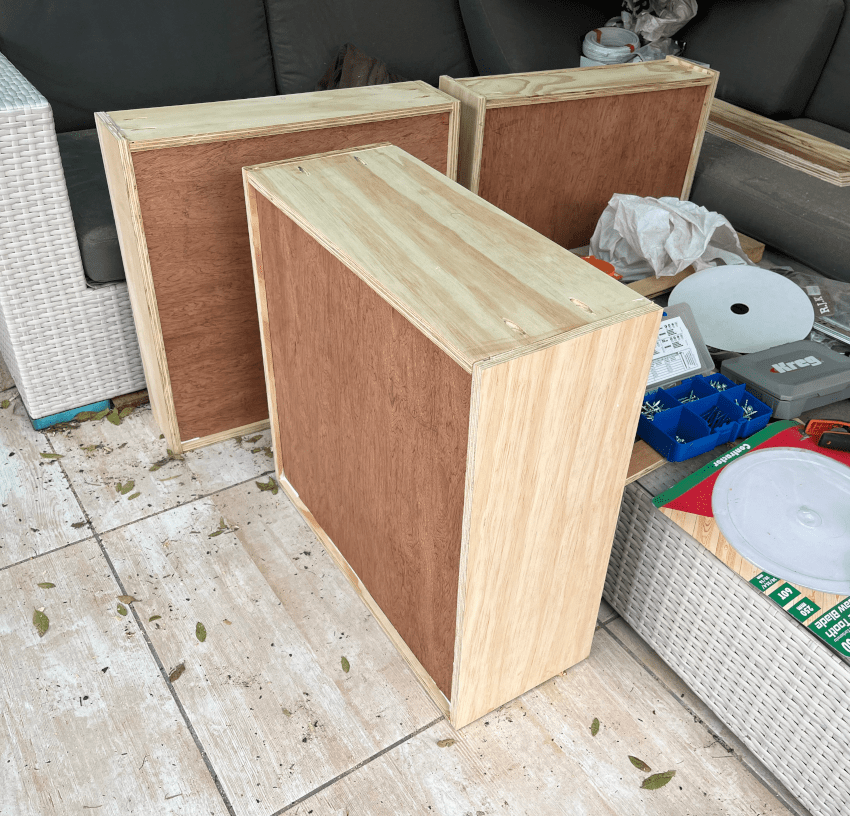
To finally assemble the panels, I did the traditional dry-fit. With the help of a rubber mallet (because no I do not own a wooden one) and a saw… The purpose of the saw was quite simply that I cut the plywood slightly oversize to begin with. Not entirely accidentally. By cutting the sheets slightly large, I gave myself a margin of error I was comfortable with. That way if I routed a dado too deep, I could account for it in the panel size. When it comes to woodworking, I (almost) always prefer things to be a few millimetres too big than too small. A generous helping of glue, and some good clamping later, I eventually had all three of my panels. And I was starting to realise how heavy my final result was going to be.

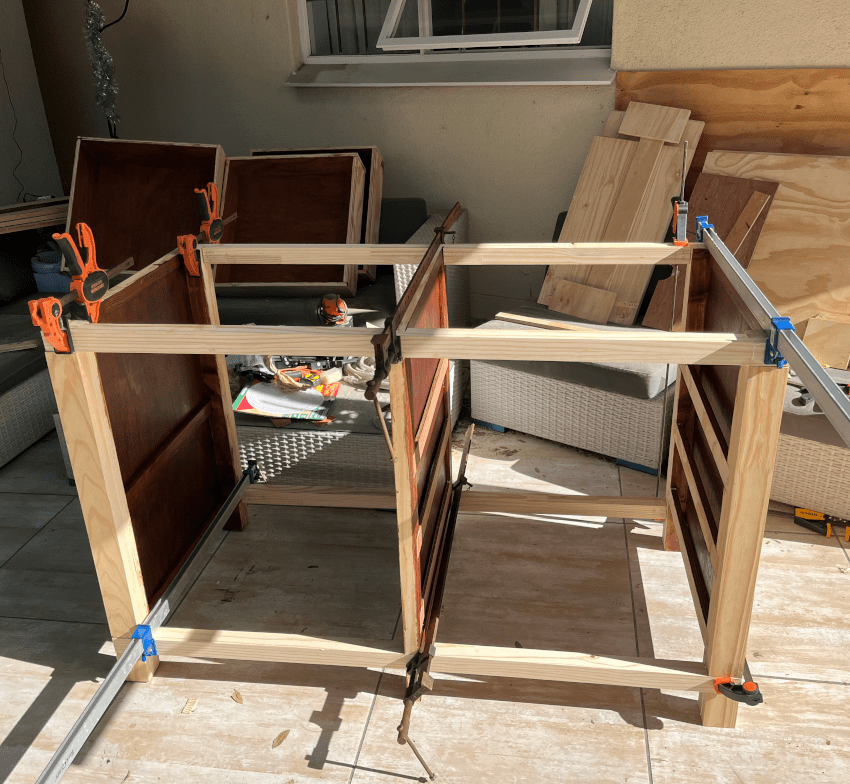
Having ordered my wood in February, by the end of July I was finished cutting all the lap joinery to put the entire frame together. And this was where I made my most critical mistake. Not project ending, but infuriating without a doubt. I built my drawers too big. I’m a software engineer, off-by-one errors are common. But when that one is making your drawer boxes 1cm too big, so they do not fit into the slides, it is far worse than when you loop one time too many through a list. The sequence of events leading up to this was quite simple. I couldn’t complete all the joinery on the carcass until I had added spacers to which I would attach the drawer slides. The negative space I had left on the panels was such that I wasn’t going to be able to make the attachments without adjustment. So, I didn’t build the drawers to the measure of the actual space they would go in, but rather to the theoretical size I believed they should be. Which was close, but didn’t account correctly either for the size of the drawer slides themselves, or the additional spacers on which they were mounted.
Why did I do the work out of order? Quite simply because the spacers were a little finicky, and required me to do a whole lot of thinking before I managed to solve the problem. In the mean time I wanted to keep the project moving, and so I figured the drawer boxes would be pretty straightforward. Not without issues, but not finicky. I had to resize the wood I had ordered to fit the change in my design, which meant getting out the job site table saw previously borrowed from my father. Then realising that it had a somewhat blunt blade, so off to get a new one, change the blade in the saw, and then have a go at cutting things to size. I had some minor disagreements with the fence, as it occasionally slips if you ran the workpiece against it with too much vigour. In the end, though, I had all the right pieces of wood to be able to play with something YouTube makes look a lot easier than it really is. Building drawer boxes with pocket screws.
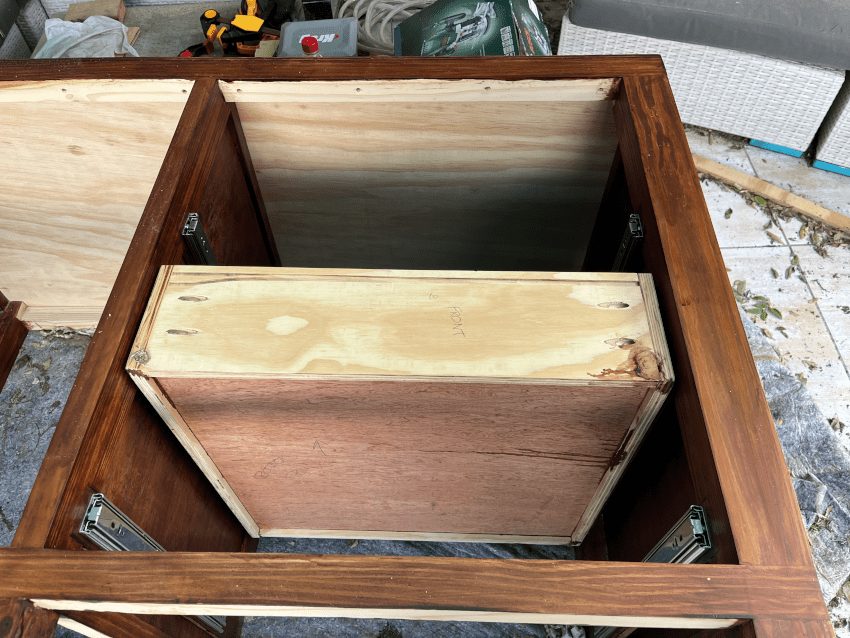
Drilling pocket holes is easy, because you buy a jig and then it is just drilling some holes. It is getting the screws to go in without jiggling the workpiece which I found challenging. It may simply be that I do not own clamps in the right shape and size, or it may be that the screws do not behave as well as I expected. Either way, I’m not convinced the pocket screws were the best thing for this job. They certainly serve a purpose in plywood joinery, but they certainly fought back in this instance. So there may be some uneven lines in the drawers where corners do not perfectly match. They are incredibly sold though, having been built out of 15mm ply, with 9mm ply bases slotted in, and held together with both glue and pocket screws.
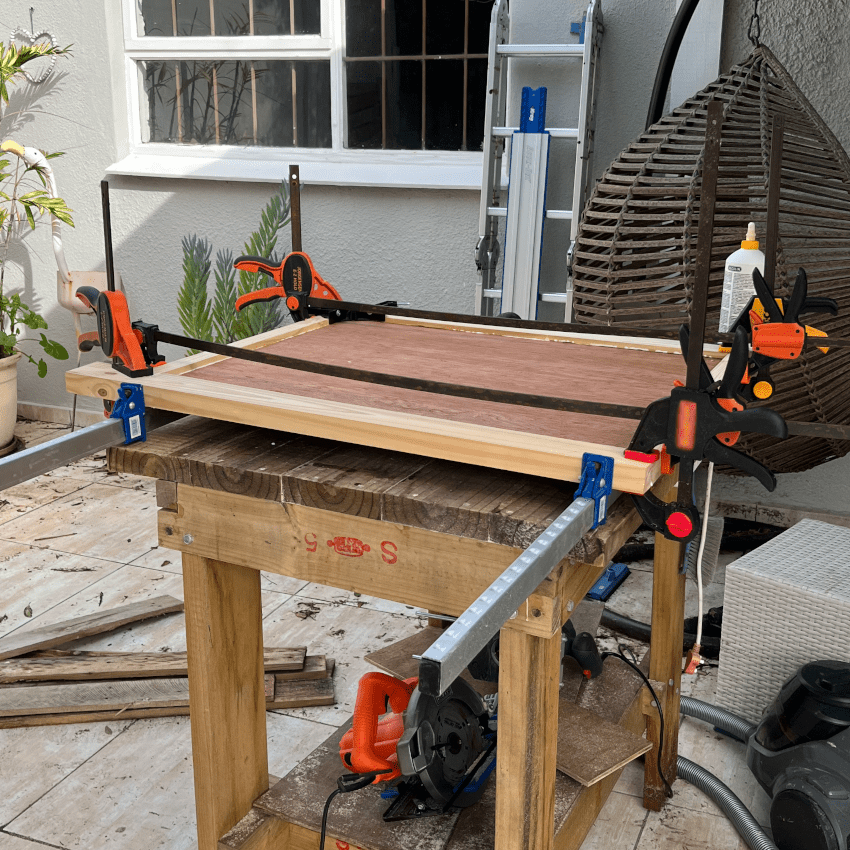
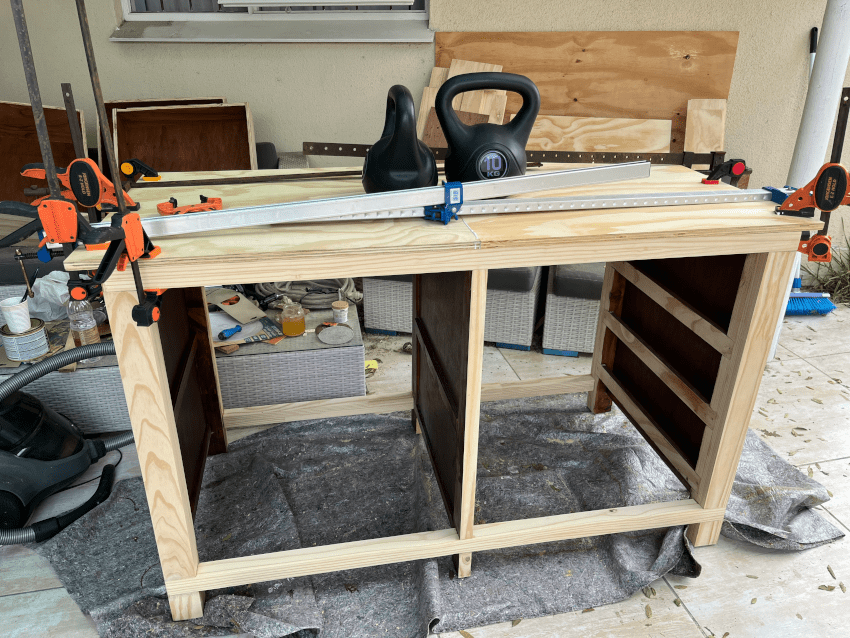
Everything cut to size, pockets routed for the rails on which the drawer slides would be attached, I could apply varnish to the inner edges of the panels. Something which I definitely appreciated later, when I didn’t have to try and paint hard to reach places. I could also finally glue the carcass together, and attach the worktop. Outside of the comedy of errors which is one person trying to manage six to eight long clamps to glue a big project together, that went fairly well. Several more hours of sanding, and I was starting to apply varnish to all surfaces.
A brief aside on the matter of sanding. Sanding is one of those aspects of woodworking which it is very easy to gloss over. It is boring and repetitive, and something which you do with a podcast on, or some good music. The trouble is, sanding well is actually non-trivial. I am too lazy, and too much of a cheapskate, to really sand well. And my pieces come out looking as if they are well sanded, and feeling great. The trouble is, if you feel across them you will notice a slight wavy texture. Which is due to two things. One, as I said, laziness. I really should maintain even sanding over the entire surface, not focus on the extra rough or dirty areas. Too much sanding of the same spot will leave a dent, and if you really want your piece to be perfect, that will spoil it. The second is my reluctance to change out my sanding pad. As the pad dulls, it cuts through the softer and harder parts of the grain differently. In a hardwood surface this may not be immediately obvious, but in a soft wood like Pine (which is what I used in this project), the difference can be extreme. So no matter how carefully I sanded to a pencil grid, and even though I go up to quite a high grit, there are still definite imperfections.
Returning to the main build. I said I made my drawer boxes too big. I also said they were both screwed and glued, and had the bottom panel slotted into the sides. So, what is a woodworker to do? In this case, we just say “eh whatever, this is essentially a workbench” and route out a slot on each side of the drawer box so that the slides will be slightly recessed. The interior of the drawer doesn’t change, and because I am going to be putting faces on them, these won’t be visible unless the drawer is fully extended and you’re looking for it. If it was a nice piece of furniture that I was building for anyone other than myself, and not slated as a learning experience, I would have been much more annoyed, and have had to somehow take the things apart and resize them.
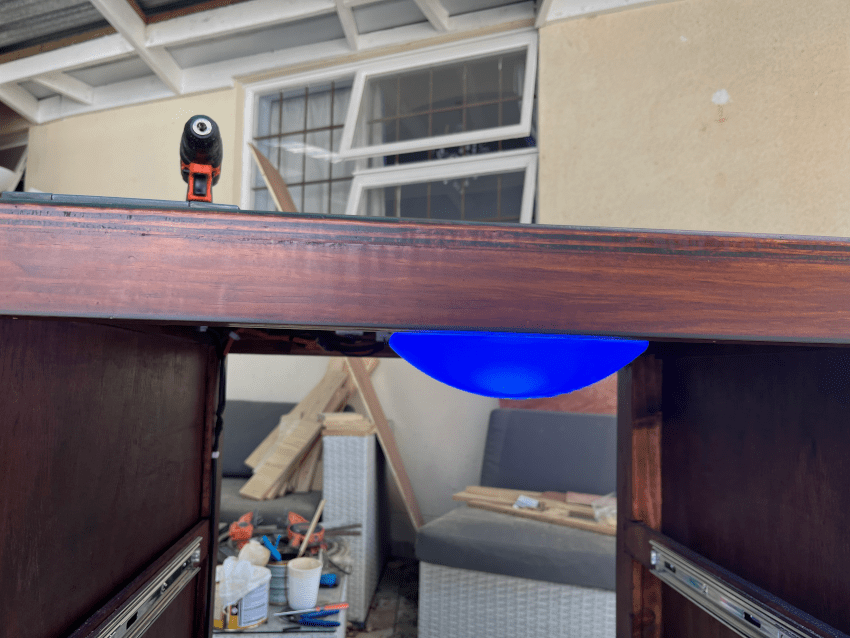
By now, it is the end of August. Learning takes time. Mistakes take time. If these are things one is okay with, they are worth the time. But I really wanted this whole thing to be basically done. I had spent some time while I waited for varnish to dry wiring up the plug point and light switch that I was planning to add. What was left was to install them in the cabinet, and make up the doors and drawer faces. Oh and also mount shelves and apply a back panel. Did I remember the adjustable feet to ensure the cabinet wouldn’t rock? Or the fact that I actually discovered, after it was all put together, that somehow the legs were not all the same length? These last pieces can take up a lot of time an energy.
One of the things I would definitely do differently is not putting a layer of varnish on the top before cutting holes in it for electronics. Not only do the tools scratch the surface, but if (when) you get something wrong that needs a little patching, it means you might as well sand it down and start again.
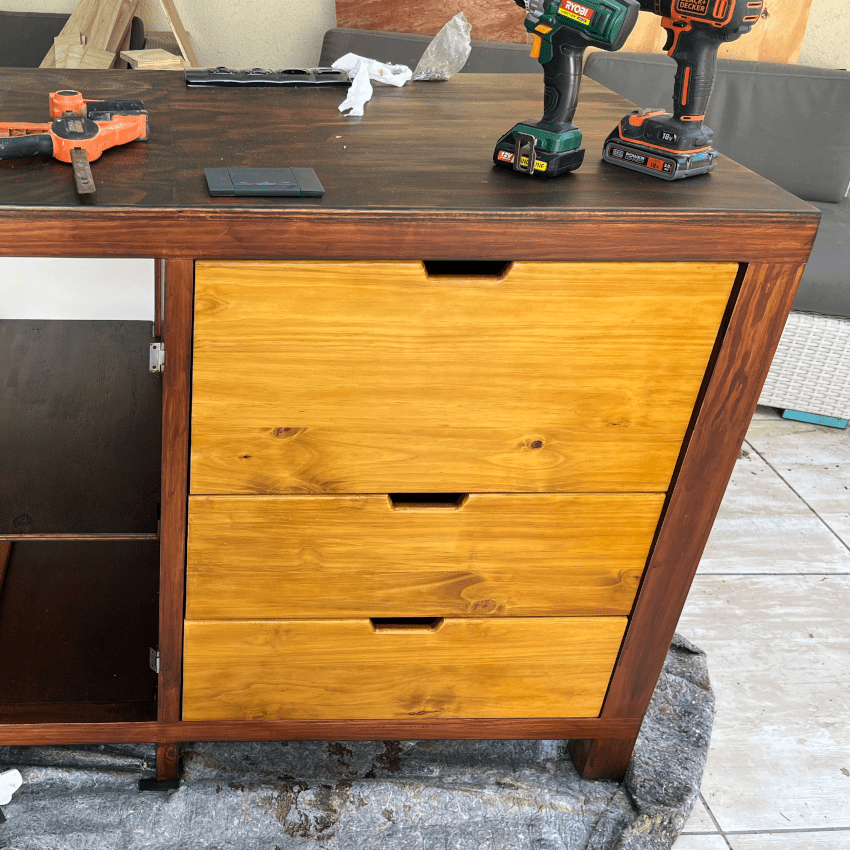
On the plus side, the drawer faces and doors worked out about as well as I had hoped. Spending some time with a jig saw and a couple of files, I made a template for cutouts on the drawer faces, going for a modern cutaway pull rather than something which I would screw on later. Then, with some help from a flush trim bit in the router, I was able to cut the exact same shape from each one. A round over bit along the inside and outside of the top edge of the drawers, and around the non-hinged exterior faces of the doors, and the profiling was done. Yes, there were some issues with things not being entirely square which influenced the exact size and shape of the doors, but because I have a track saw jig I am quite comfortable taking two or three millimetres off an edge where necessary.
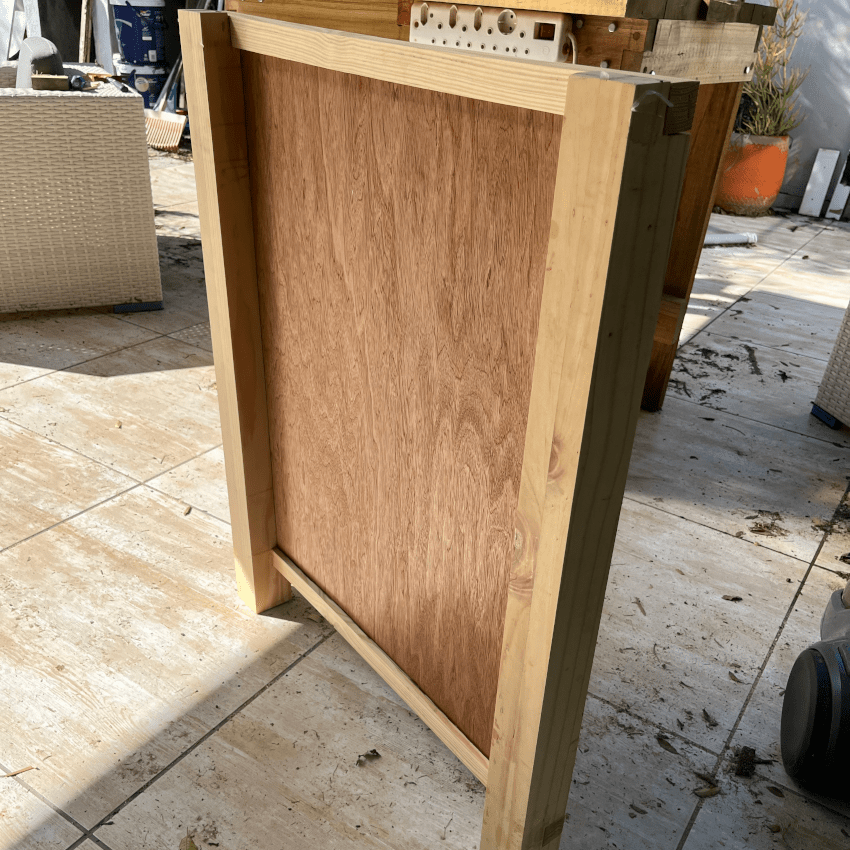
On the minus side, because I needed to cut notched corners on the shelves, I messed that up sufficiently badly that there will always be a couple of small holes at the front of the shelf. I was tired, forgot that removing 21mm from the edge to account for the doors should not shift the notches back 21mm as well, and ended up with gaps. Not the end of the world, hardly noticeable. And they really haven’t bothered me since. So, despite the fact that I definitely have some loose edges in the project, I did eventually complete it. It serves its purpose, when the printer is going at full speed I can put a cup of tea on the cabinet and it barely ripples. All the mass is contained, and I have some extra space for small items as needed. And I definitely learnt many things.